Time Approval
- Ernesia Toney
- DATABASICS, Inc.
- Loran Abdul Massih
A time approver is anyone that is set up to approve another user's timesheets. Approvals can be set up in a variety of ways. This setup will effect how an approver can view a timesheet.
- Department/Team Approvers: These approvers can modify any line in the timesheet and approve it.
- WBS Approvers (Project Approvers): Can see the entire timesheet, but may only modify/approve the lines that are charged to the WBS that s/he is in charge of.
- Policy Approvers: Time allows the admin to create policies that route the timesheet to a designated user if a policy is violated. Policy approvers have the ability to modify and approve any line in the timesheet.
Time allows an organization to create an approval structure that incorporates all approval types. Once a timesheet has been submitted, the status changes to "Released." After the first approver takes action on the report, the status is updated to "In Approval Process." All lines in a timesheet must be approved by all required approvers before the timesheet is considered "Approved."
If a timesheet is rejected, it is sent back to the user to make corrections. Depending on how the application is configured, the system may require the approvers to re-approve the timesheet due to the changes.
Accessing Time Approvals
Approvers have an additional menu item on the Dashboard called Time Approval. If you are set up as an approver, use this menu to view the reports in your approval bin.
- My Queue: Timesheets waiting for approval.
- Rejected By Me (History): Timesheets that you have rejected.
- Approved By Me (History): Timesheets that you have approved.
To Query for Timesheets:
- Click on Time Approval on the top navigation bar
- Click on the funnel icon on the top right like shown below.

- There are several fields that can be used for your query:
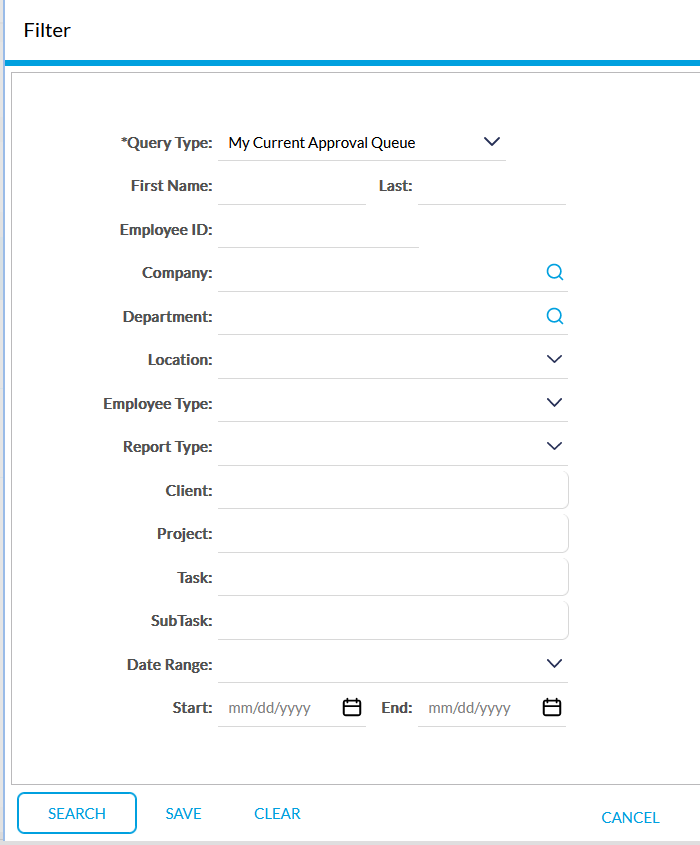
- Query Type (Required)
- My Current Approval Queue - Timesheets currently waiting for approver's action
- Approved by Me (History) - Timesheets where approver has already taken action
- Rejected by Me (History) - Timesheets the approver has rejected
- Missing Timesheets - Timesheets that have not been started by users within the approver's group
- Start Date: Period Start Date
- End Date: Period End Date
- By Employee Name/ID
- By Operating Unit - (this may be labeled differently for your configuration)
- By Department - (this may be labeled differently for your configuration)
- By Location - (this may be labeled differently for your configuration)
- By Employee Type - (this may be labeled differently for your configuration)
- By Report Type - (this may be labeled differently for your configuration)
- Query Type (Required)
After accessing your approval queue, you can approve from the list or approve from within the timesheet. You can also route timesheets to another approver from this screen.
Approve/Reject from the List
If enabled by the administrator, Time allows approvers to approve timesheets from their approval queue without being forced to open it.
Note: Timesheets with validation warnings (flagged) cannot be approved from the list. They must be opened to view the message attached to the flag.
- Select the timesheets you wish to approve or reject. You may select multiple timesheets.
- Click on the Approve
 or Reject
  button.
- Approve: A pop up box will have you certify that you have reviewed these timesheets. You may also enter an optional message for the owner of the timesheet. Click Finish when done.
- Reject: A pop up box will ask you to enter a required note explaining the rejection or, depending on your configuration you will be required to select a reason for the rejection. Click Finish when done.
3. The timesheet will be removed from your bin.
Routing a Timesheet
If enabled by the administrator, Time allows you to route a timesheet to another approver.
To route a timesheet:
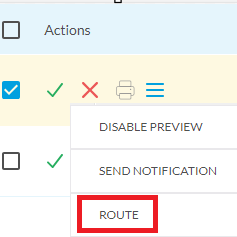
- Select the timesheet(s) you wish to route by selecting the corresponding checkboxes
- Click on Menu icon under action column and select Route
- In the Timesheet Approval Routing window, enter the following:
- Route to Manager (Required): If you know the name or ID, type it into the field. Otherwise use the search function by clicking on the magnifying glass icon
 .
. - Replace Current Approver:
- Select "Yes" to replace yourself in the approval process. The timesheet will be removed from your queue.
- Select "No" to remain in the approval process. The timesheet will then require approval by both yourself and the manager you are routing the timesheet to.
- Email To Manager: Select whether or not to notify the manager that you are routing a timesheet to them.
- Notes (Required): Explain why you are routing this timesheet.
- Click on Apply once all the fields are completed.
- Route to Manager (Required): If you know the name or ID, type it into the field. Otherwise use the search function by clicking on the magnifying glass icon

Approve/Reject Within the Timesheet
As an approver, you may also approve/reject within the timesheet itself. This allows you to view all of the details of the timesheet, including:
- Number of hour charged
- OBS/WBS distribution
- Notes
- Time Codes
- and much more
Open the timesheet by clicking on the timesheet's reporting period (Start Date - End Date) or the edit icon![]()
Approve All & Exit
The Approve All & Exit button approves the entire timesheet.
- Click on the Approve All & Exit button. A "Confirmation" window will pop up.
- Optional: Enter any notes into the field.
- Click on the Finish button.
- You will be taken back to the Time Approval screen.
Reject All & Exit
The Reject All & Exit button rejects the entire timesheet.
- Click on the Reject All & Exit button. A "Rejection Notes" window will pop up.
- Required: Enter the reason why the timesheet was rejected in the notes field.
- Click on the Finish button.
- You will be taken back to the Time Approval screen and the report will be removed from your queue.
- The Timesheet will be sent back to the user who submitted it with the note explaining why the report was rejected.
- If you wish to retrieve a rejected report, use the My Rejections feature in the Time Approval menu on the top navigation bar.
Approve or Reject by Line Item
You can approve or reject individual line items.
- Right-Click on the line you wish to approve or reject.
- Select either Approve or Reject from the pop up menu.
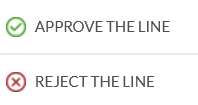
- If you click Reject you will be required to enter the reason why the line is being rejected.
Click Save & Exit when you are done.
Note: If the approver rejects individual timesheet lines, then clicks:
- Approve & Exit: the individual line rejections will be overwritten and the entire timesheet will be approved.
- Reject & Exit: The entire timesheet will be rejected and the individual line rejections and their messages will be saved and sent back to the employee that submitted the timesheet.
Out of Office
Approvers can designate their delegate approvers during their absence using "Out Of Office" approver function. If an approver is not able to assign a delegate approver, administrators can assign delegates on their behalf.
- Click on the drop down arrow next to your name. This will be on the top right hand corner the application.
- Click on "My Preferences"
- Click on the "Out Of Office" tab
- In the "Set Out of Office for" field select the main approver on behalf of which you are trying to assign a delegate approver - Defaults to "Me". If you have team members that report to you and they are an approver as well, they will show up in this list so you can assign a delegate approver on their behalf.
- Provide the duration of the assignment by filling in the Start and End Date fields.
- Select the delegate approver from the Approver 1 drop down list. Please note that only another user with approval rights can be selected from the list.
- Select if the delegate will be approving Both (Time and Expense), Time Only, or Expense Only.
- If applicable, assign up to 3 additional delegate approvers.
- Click "Apply Changes" to save changes.
Related content
2025 DATABASICS, Inc