Time Off/Leave Request
Leave Balance Report
Before submitting any Time Off Request, the user should know their Leave Balance for the period(s) that they are requesting off. Depending on the configuration the leave balance may be viewed via the following screens:
- On the right top corner of the homepage screen
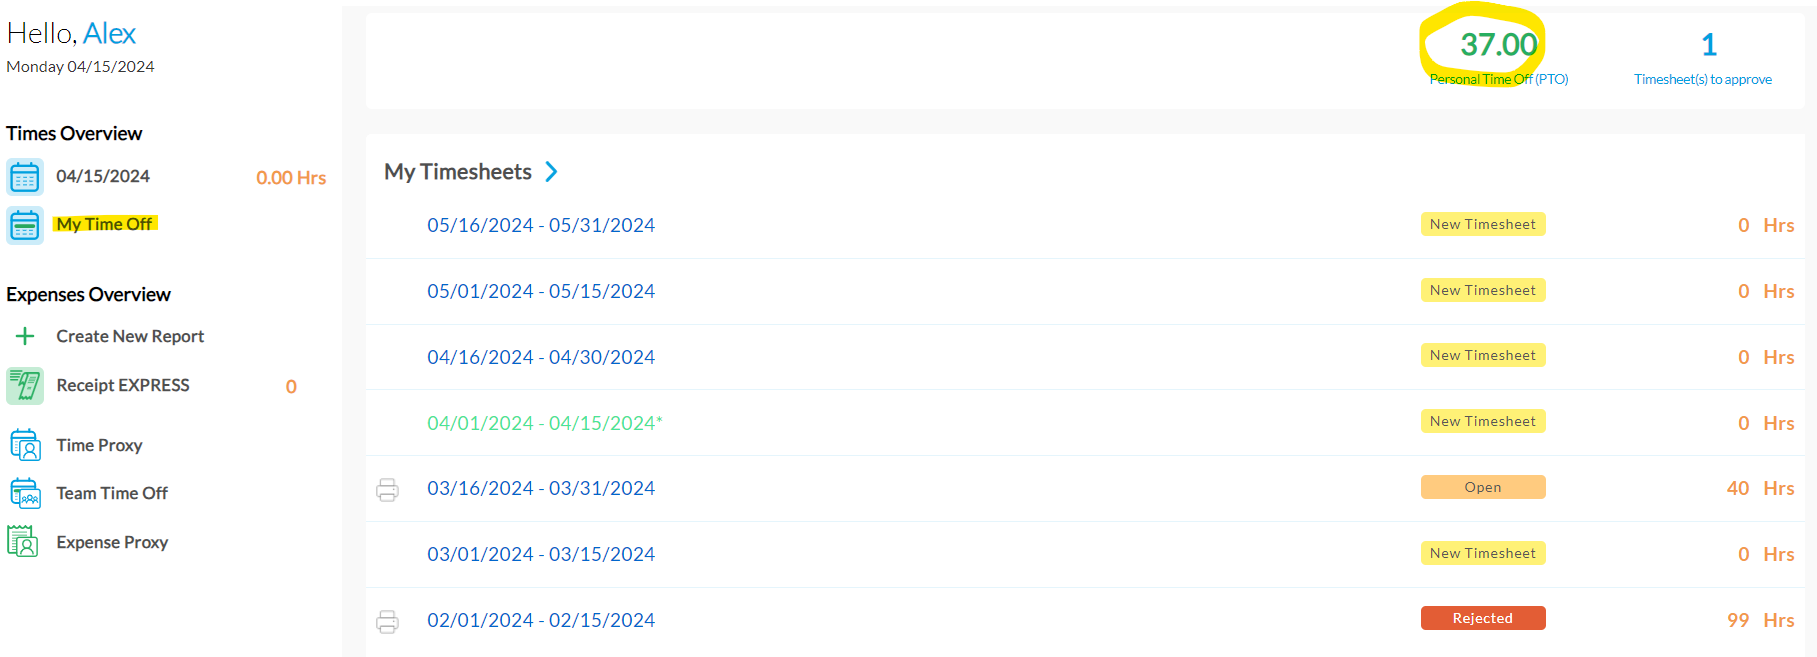
- On the left side of the application via My Time Off tab
- press on the time off icon inside the timesheet

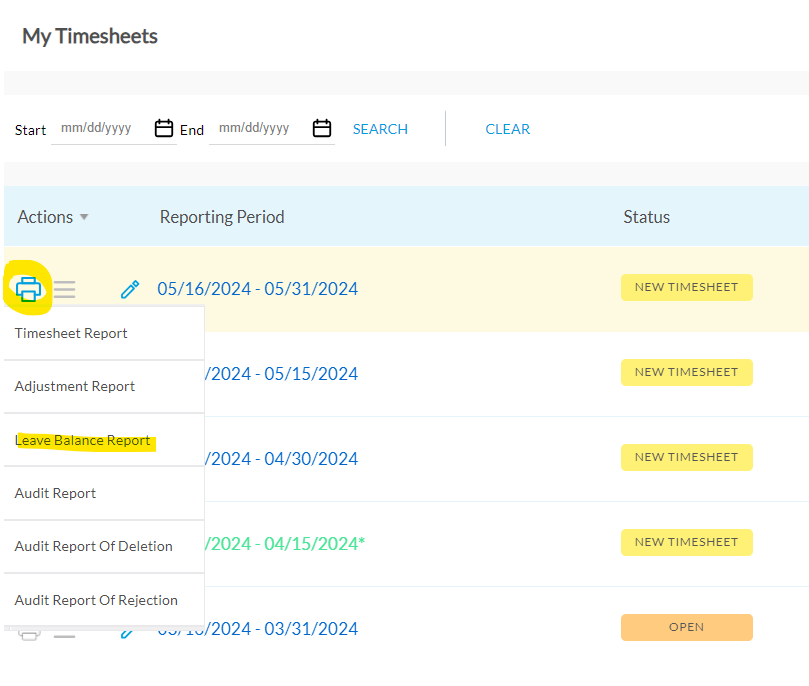
- Or by running` the Leave Balance Report for any timesheet period. Available from the timesheet list page
The report consists of the following information:
For each PTO Group:
- Starting Balance: The Previous Period’s ending balance
- If no manual balance adjustments were made to this period:
- Accrued Hours: The number of hours the user accrued during this period based on the Base Accrual Rate in the Leave Method setup
- If manual balance adjustments were made to this period:
- Net Accrued Hours: Accrued Hours+/- Bank Hours +/- Adjusted Balance
- Accrued Hours: The number of hours the user accrued during this period based on the Base Accrual Rate in the Leave Method setup
- Adjusted Balance: Manually +/- adjusted hours by admin.
- Bank Hours: The bank amount for this period was +/- adjusted
- Taken this Period: The number of PTO hours on this timesheet
- Net Accrued Hours: Accrued Hours+/- Bank Hours +/- Adjusted Balance
- Ending Balance: (Starting Balance + Net Accrued Hours) - Hours Taken
Leave Period Hours:
- Shows the days on which PTO was added for the entire year
- Shows the days on which PTO was added on this timesheet
6 Month Leave Balance:
Shows the breakdown of Starting/Ending Balances, accrued hours and used hours by timesheet period over the 6 month period span.
Submitting a Time Off/Leave Request
For the user’s convenience, there are several ways a user can request time off in DATABASICS. Each method will create a timesheet with PTO that is submitted to their supervisor for approval. Which option to use is up to the user and their preference.
Open the timesheet and enter the hours manually.
The user can simply go to the timesheet and enter PTO hours directly into the timesheet. Please note that this is the only way for a proxy to submit PTO on another user’s behalf.
- Go to the timesheet list
- Find the timesheet where PTO hours are to be added
- The user may have to use the search function in order to find a future or past timesheet that is not on the default list
- Access the timesheet
- Click Add and select the PTO time code
- Enter the hours in the cell corresponding with days being requested off for PTO
- Click the Save icon or hit enter to save the line
- Submit the timesheet.

Select a future timesheet from the Time Off screen
The user can access the Time Off screen to view future timesheet periods and their balance for each period. Only the owner of the timesheet can view their own Time Off Screen
- On the DATABASICS home page, click on “My Time Off” to access to the Time Off Screen
- Select the type of PTO from the tabs on the left
- DATABASICS will display the following for that PTO group
- Reporting Period: the timesheet start and end date
- Status: the status of the timesheet, if it exists
- Starting Balance: the ending balance from the previous timesheet
- Net Accrued Hours: Accrued Hours +/- Bank Hours +/- Adjusted Balance
- Hours Taken: The number of PTO hours taken in this period
- Ending Balance: the final balance for this period
- Find the period where PTO hours are to be added
- Access the timesheet by clicking into the Reporting period
- Click Add and select the PTO time code
- Enter the hours in the cell corresponding with days being requested off for PTO
- Click the Save icon or hit enter to save the line
- Submit the timesheet.
Use the Request Time Off Feature
The user may also user the Request Time Off feature to enter a date range and Time Code to request off for a block of days.
On the DATABASICS home page, click on “My Time Off”
Press the Time Off Calendar tab
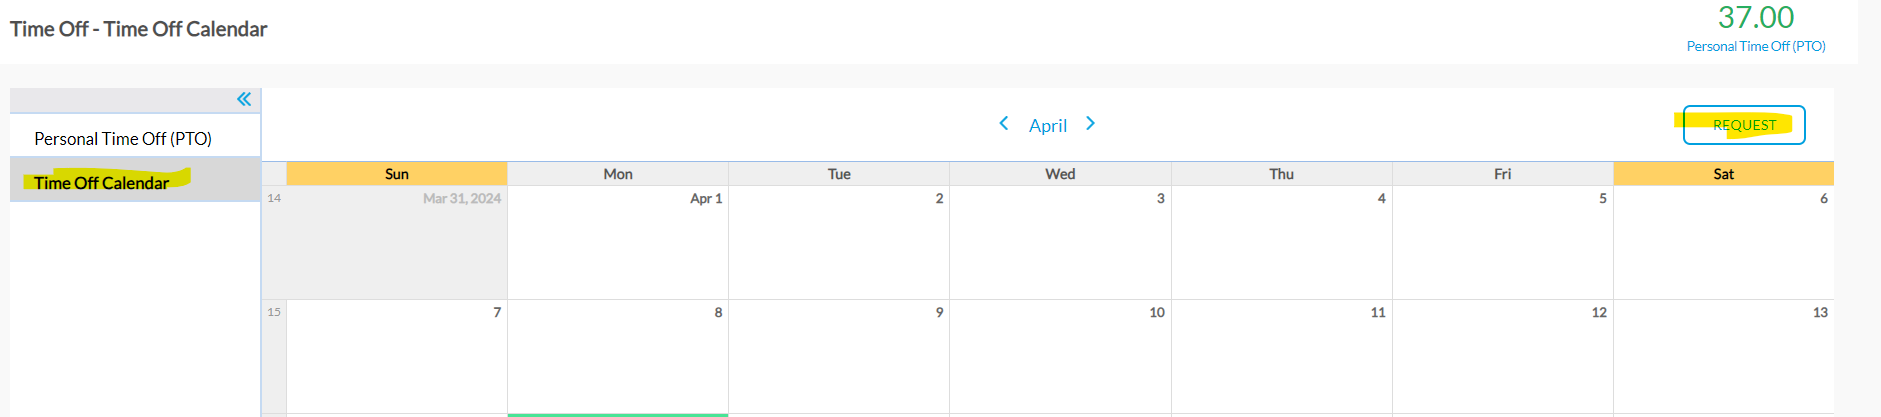
Press the Request button to access to the Time Off Screen:
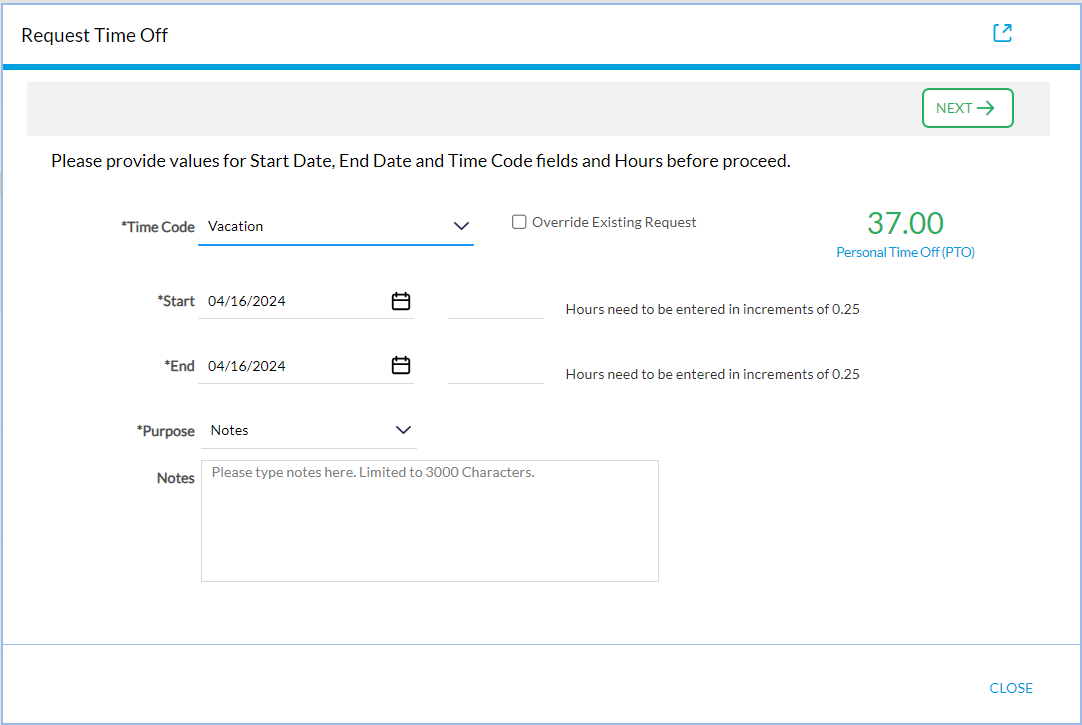
- In the Request Time Off screen, enter the following:
- Time Code: the time off code you are trying to request
- check the Override Existing Request if there is an existing time off request for the selected dates and you would like to override it
- Start Date: enter the first day for which the user is requesting PTO and the corresponding hours being requested (Full Day or Half Day Increments)
- End Date: enter the last day for which the user is requesting PTO and the corresponding hours being requested (Full Day or Half Day Increments)
Note for and Administrator: The Employee Full Time Equivalent needs to be more than 0 for the hours to be populated for the range of days
- Click Next
- The application will create a timesheet and fill in the hours based on the selections above. If the date range spans multiple timesheets, DATABASICS will create all of the timesheets that fulfill the time off request.
- Click on the timesheet period to edit any details on the timesheet
- Click Save as Draft & Exit to just save the timesheets
- Click Submit to submit these timesheets to the user’s supervisor for approval
- Click Cancel to cancel out of the request.
If a timesheet is in the Draft status the Cancel button will actually save the time off hours requested on a timesheet, in order to prevent users from the inadvertent loss of data. If a timesheet is already submitted for approval the Cancel button will actually cancel the latest changes to the timesheet.
2021 DATABASICS, Inc